

Friday, October 5, 2012
Cat vs. Human
Seriously, it's like this blog knows my life. Cat versus human. In my household it's human versus cat. And Raven always wins. Jerk.


Wednesday, October 3, 2012
DIY #BonefishGrill Bang Bang Shrimp
Have you ever had Bonefish Grill? They are very yummy. The hubby and I love Bang Bang Shrimp. Seriously. I could eat a whole helping. Don't judge me.
Because we are really trying to save money (being a grown-up sucks!) we've decided to cut back on our eating out and recreate dishes at home. Nom.
So, I present you with the DIY Bang Bang Shrimp recipe.
Yes, I need a fancier title....
And a more appetizing picture.......
 Thank you Fake Ginger for this delicious recipe, below!
C and I then made Bang, Bang Tacos. We used spanish rice, the bang bang shrimp, lettuce, tomato and sour cream in tortillas and man. I'm fat and happy!
Have you ever recreated a recipe from a restaurant? I'd love to hear your finds!
Because we are really trying to save money (being a grown-up sucks!) we've decided to cut back on our eating out and recreate dishes at home. Nom.
So, I present you with the DIY Bang Bang Shrimp recipe.
Yes, I need a fancier title....
And a more appetizing picture.......

I followed the directions and recipe to a T and I wouldn't change anything. Except I didn't have onion powder, so I omitted that. I'd add it next time.
Bang Bang ShrimpYield: 2 – 4 as appetizerIngredients
- 1 lb. medium shrimp, peeled and deveined
For the sauce:
- ½ cup mayonnaise
- 4-5 teaspoons chili garlic sauce, such as Sriracha sauce
- 1 teaspoon granulated sugar
- 1 teaspoon rice vinegar
For the egg mixture:
- 1 egg, beaten
- 1 cup milk
For the breading mixture:
- ½ cup all-purpose flour
- ½ cup panko breadcrumbs
- 1 teaspoon salt
- ½ teaspoon ground black pepper
- ¼ teaspoon onion powder
- ¼ teaspoon garlic powder
- ¼ teaspoon dried basil
For frying:
- 8 to 12 cups vegetable oil
Instructions
- Combine all ingredients for the sauce in a small bowl; cover and set aside.
- Combine beaten egg with milk in shallow bowl; set aside.
- Combine flour, panko, salt, black pepper, onion powder, garlic powder, and basil in another shallow bowl; set aside.
- Bread the shrimp by first coating each with the breading mixture. Dip breaded shrimp into the egg and milk mixture, and then back into the breading. Arrange the coated shrimp on a plate and pop them into the fridge for at least 20 minutes. This step will help the breading to stick on the shrimp when they are frying.
- Heat oil in deep fryer to 350 degrees F. Use amount of oil required by your fryer.
- When oil is hot, fry shrimp 2 to 3 minutes or until golden brown. Drain on rack or paper towels.
- When all shrimp has been fried, drop the shrimp into a large bowl. Spoon about ¼ cup of sauce over shrimp and stir gently to coat.
C and I then made Bang, Bang Tacos. We used spanish rice, the bang bang shrimp, lettuce, tomato and sour cream in tortillas and man. I'm fat and happy!
Have you ever recreated a recipe from a restaurant? I'd love to hear your finds!
Tuesday, October 2, 2012
DIY Hair Tie
Have you heard of Twistbands? If not, I talk about them here.I love them. I really, really do. However, I wanted to create some of my own because, let's face it, I'm cheap.
I found a fabulous tutorial here and got to work!
First, I poured my elastic on the counter. Because, you know, counters are the best place to work (so close to the fridge! NOM)
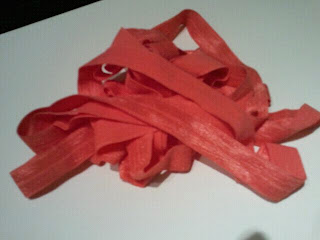 I then mastered my game plan. So, the tutorial says measure 9 inches. Since my lazy butt was already plopped at the table, rather than getting up and walking upstairs to grab a tape measure I used a dollar bill, which is 7 inches and eyeballed the extra two. I never claimed to be a measuring wiz, folks.
Step two:
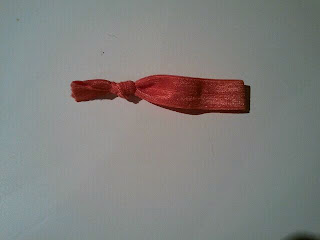 I tied a knot, and used a lighter to burn the edges, so it wouldn't fray. Viola. Easiest DIY EVER!
 And there ya have it!
Now I shall never lose a Twistband again!
Happy crafting!
I found a fabulous tutorial here and got to work!
First, I poured my elastic on the counter. Because, you know, counters are the best place to work (so close to the fridge! NOM)

Step two:
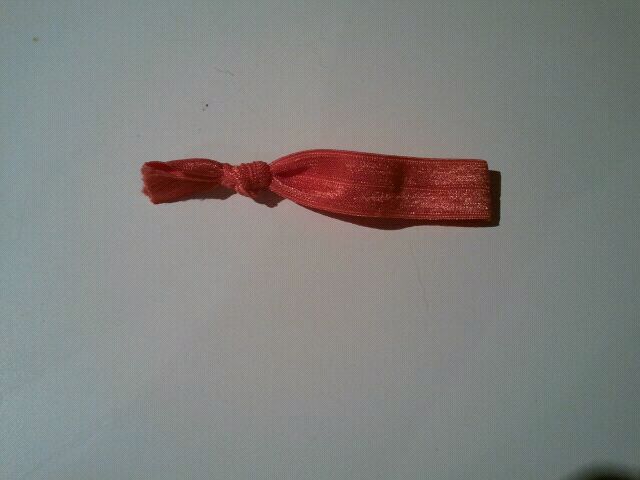

Now I shall never lose a Twistband again!
Happy crafting!
Thursday, September 27, 2012

Thursday, August 16, 2012
DIY: Arm Candy Upcycling

Just to make sure you aren't reading any further, I shall now distract you with cuteness....

For the rest of you, I wanted to share my creation and how I made it. Happy crafting!
First, gather a pile of old t-shirts, two key rings, scissors, a hot glue gun and a needle and thread.


Now, cut three strips from your old tshirts a little larger than the length of your wrist. I just wrapped around my wrist and cut about 2 inches extra. Yes, I'm that precise.
Now, here's the fun part. I tugged my strips so they curled, stacked them one on top of the other and put a little stitch through them to keep them in place. Then, I just started braiding.

Trust me, it's much cuter on!
So easy and definitely a great use for those old tshirts. Upcycling at its finest!
Monday, July 30, 2012
Bye Bye My Artichoke Pie.....
I don't claim to be a chef, nor would I list "cooking" as one of the many skills on my resume. Instead, I'd call myself a dappler in the kitchen. I tend to try new things- often to find they are epic fails. However, I did have one success that I must share.
Artichoke Pie!
I follow the recipe I found on Allrecipes.com, with a few variations.
Now, for my modifications.
I add onions. I add shallots this last time and they were money!
Also, I try to stick with jarred hearts, rather than those in the can for two reasons. 1. My fat cats think it's feeding time and I was surrounded. 2. They almost had a "pickled" taste to them. The ones in the jar don't. I think I'll go that route from now on.
I also throw another pie crust on top, so there are two layers of pie crust. I love carbs, what can I say?!
This is my go to recipe whenever I have to go somewhere and bring a dish. Nom.
It's so good, it's gone......
Artichoke Pie!
I follow the recipe I found on Allrecipes.com, with a few variations.
Ingredients
Directions
- Preheat oven to 350 degrees F (175 degrees C).
- Heat oil in a large skillet over medium heat. Saute garlic until it starts to brown. Stir in the artichoke hearts and cook 10 minutes before adding the bread crumbs and half of the parmesan cheese. When heated through, transfer half of artichoke mixture to pie crust.
- Pour eggs over artichoke mixture and sprinkle in the rest of the parmesan cheese. Spoon the rest of the artichoke mixture into the pie and top with mozzarella cheese.
- Bake in preheated oven for 45 minutes, or until crust begins to brown.
I add onions. I add shallots this last time and they were money!
Also, I try to stick with jarred hearts, rather than those in the can for two reasons. 1. My fat cats think it's feeding time and I was surrounded. 2. They almost had a "pickled" taste to them. The ones in the jar don't. I think I'll go that route from now on.
I also throw another pie crust on top, so there are two layers of pie crust. I love carbs, what can I say?!
This is my go to recipe whenever I have to go somewhere and bring a dish. Nom.
It's so good, it's gone......
Friday, July 27, 2012
The Three Musketeers
My boys stick together. Especially when trying to catch those dang birdies!


Could they be any cuter?! LOVE!
Subscribe to:
Posts (Atom)






 Posts
Posts


